[ 실행 화면 ]
 |
 |
키워드 6개 버튼 중 '프로그래밍' 키워드를 눌렀을때 나오는 xml창을 만들어보기로 결정.
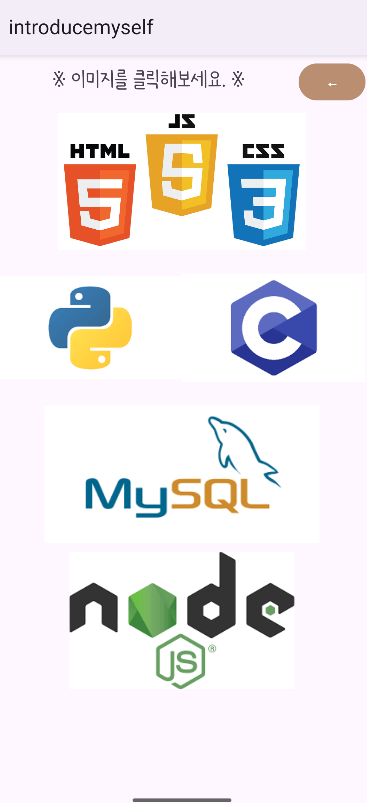
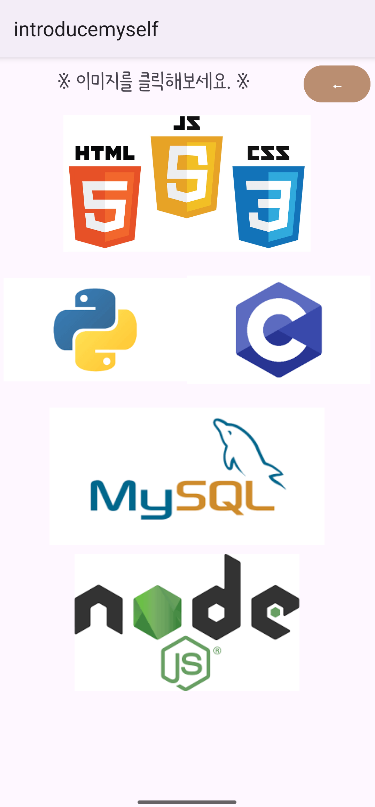
xml창을 열면 내가 사용해보았던 / 사용할 수 있는 언어들이 이미지로 나타나고,
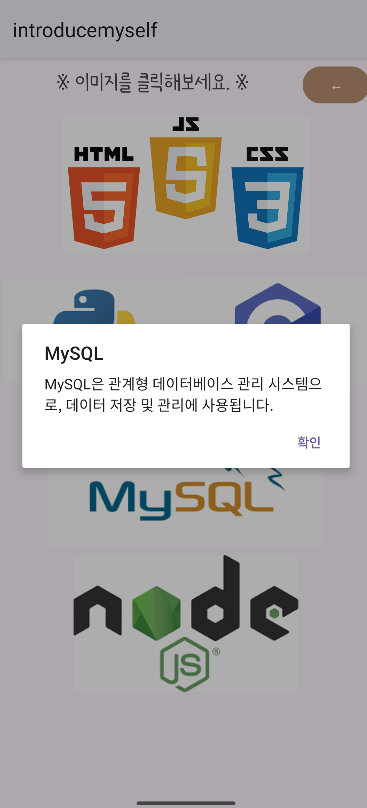
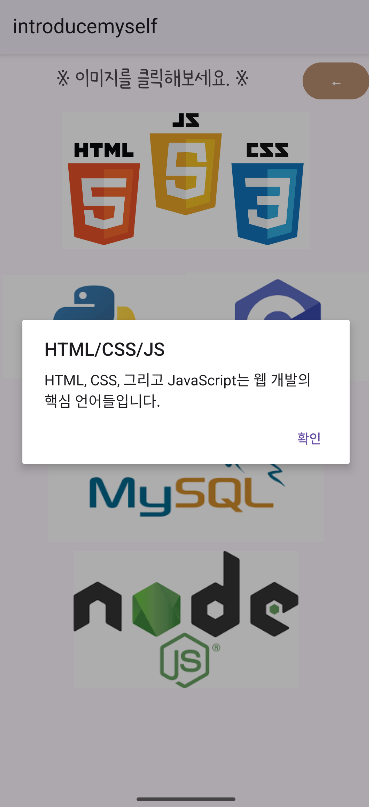
이 이미지를 클릭했을때 부가적인 설명을 하고싶었는데 인터넷에 찾아보니
'AlertDialog'를 사용할 수 있다고 해서 적용해보았다. (AlertDialog는 다른 포스팅에서 제대로 공부해보기)
AlertDialog 설명 부분은 필요할때마다 알아서 바꾸기!
- activity_main.xml에서 프로그래밍 버튼을 누르면 activity_language.xml로 변환
- activity_drawer.xml에서 프로그래밍 TextView를 누르면 activity_language.xml로 변환
- activity_language.xml에서 각 이미지마다 AlertDialog 추가
- activity_language.xml → activity_main.xml로 돌아가는 버튼 추가 후 java 코드에 넣기
1. activity_language.xml (이미지 파일은 모두 mipmap에 저장)
<?xml version="1.0" encoding="utf-8"?>
<androidx.drawerlayout.widget.DrawerLayout xmlns:android="http://schemas.android.com/apk/res/android"
    android:id="@+id/language_layout"
    android:orientation="vertical"
    android:layout_width="match_parent"
    android:layout_height="match_parent">


    <LinearLayout
        android:orientation="vertical"
        android:layout_width="match_parent"
        android:layout_height="match_parent">

        <LinearLayout
            android:orientation="horizontal"
            android:layout_margin="5dp"
            android:layout_width="match_parent"
            android:layout_height="48dp">

            <TextView
                android:fontFamily="@font/font"
                android:textSize="23sp"
                android:gravity="center"
                android:layout_width="0dp"
                android:layout_weight="9"
                android:layout_height="wrap_content"
                android:text="※ 이미지를 클릭해보세요. ※"/>

            <Button
                android:textStyle="bold"
                android:text="←"
                android:backgroundTint="#BA8E71"
                android:layout_weight="2"
                android:id="@+id/btn_home2"
                android:layout_width="0dp"
                android:layout_height="match_parent" />

        </LinearLayout>

        <LinearLayout
            android:layout_margin="5dp"
            android:layout_width="match_parent"
            android:layout_height="150dp">

            <ImageView
                android:id="@+id/iv_htmlcssjs"
                android:layout_width="match_parent"
                android:layout_height="match_parent"
                android:src="@mipmap/htmlcssjs" />


        </LinearLayout>

        <LinearLayout
            android:layout_margin="5dp"
            android:orientation="horizontal"
            android:layout_width="match_parent"
            android:layout_height="150dp">

            <ImageView
                android:id="@+id/iv_python"
                android:src="@mipmap/pythonlogo"
                android:layout_width="0dp"
                android:layout_weight="1"
                android:layout_height="match_parent"/>

            <ImageView
                android:id="@+id/iv_c"
                android:src="@mipmap/clanguage"
                android:layout_width="0dp"
                android:layout_weight="1"
                android:layout_height="match_parent"/>


        </LinearLayout>

        <LinearLayout
            android:layout_margin="5dp"
            android:orientation="horizontal"
            android:layout_width="match_parent"
            android:layout_height="150dp">

            <ImageView
                android:id="@+id/iv_mysql"
                android:src="@mipmap/mysql"
                android:layout_width="0dp"
                android:layout_weight="1"
                android:layout_height="match_parent"/>

        </LinearLayout>

        <LinearLayout
            android:layout_margin="5dp"
            android:orientation="horizontal"
            android:layout_width="match_parent"
            android:layout_height="150dp">

            <ImageView
                android:id="@+id/iv_nodejs"
                android:src="@mipmap/nodejs"
                android:layout_width="0dp"
                android:layout_weight="1"
                android:layout_height="match_parent"/>

        </LinearLayout>


    </LinearLayout>

</androidx.drawerlayout.widget.DrawerLayout>
2. 수정된 MainActivity.java (LanguageActivity.java로의 intent전환)
package com.example.introducemyself;

import android.content.Intent;
import android.net.Uri;
import android.os.Bundle;
import android.view.MotionEvent;
import android.view.View;
import android.widget.Button;
import android.widget.TextView;

import androidx.activity.EdgeToEdge;
import androidx.annotation.NonNull;
import androidx.appcompat.app.AppCompatActivity;
import androidx.core.graphics.Insets;
import androidx.core.view.ViewCompat;
import androidx.core.view.WindowInsetsCompat;
import androidx.drawerlayout.widget.DrawerLayout;

public class MainActivity extends AppCompatActivity {

    Button btn_language;
    Button btn_bowling;
    TextView me_bowling;
    Button btn_drawer;
    TextView me_programming;
    //DrawerLayout과 View 2개를 만들어준다.

    private DrawerLayout drawerLayout;
    private View drawerView;


    @Override
    protected void onCreate(Bundle savedInstanceState) {
        super.onCreate(savedInstanceState);
        EdgeToEdge.enable(this);
        setContentView(R.layout.activity_main);
        ViewCompat.setOnApplyWindowInsetsListener(findViewById(R.id.drawer_layout), (v, insets) -> {
            Insets systemBars = insets.getInsets(WindowInsetsCompat.Type.systemBars());
            v.setPadding(systemBars.left, systemBars.top, systemBars.right, systemBars.bottom);
            return insets;
        });


        drawerLayout = findViewById(R.id.drawer_layout);
        drawerView = findViewById(R.id.drawer);
        btn_bowling=findViewById(R.id.btn_bowling);
        btn_bowling.setOnClickListener(new View.OnClickListener() {
            @Override
            public void onClick(View view) {
                //Intent 객체 생성
                Intent intent = new Intent(MainActivity.this, BowlingActivity.class);
                startActivity(intent);
            }
        });

        btn_language=findViewById(R.id.btn_language);
        btn_language.setOnClickListener(new View.OnClickListener() {
            @Override
            public void onClick(View view) {
                //Intent 객체 생성
                Intent intent = new Intent(MainActivity.this, LanguageActivity.class);
                startActivity(intent);
            }
        });

        me_bowling=findViewById(R.id.me_bowling);
        me_bowling.setOnClickListener(new View.OnClickListener() {
            @Override
            public void onClick(View view) {
                //Intent 객체 생성
                Intent intent = new Intent(MainActivity.this, LanguageActivity.class);
                startActivity(intent);
            }
        });

        me_programming=findViewById(R.id.me_programming);
        me_programming.setOnClickListener(new View.OnClickListener() {
            @Override
            public void onClick(View view) {
                //Intent 객체 생성
                Intent intent = new Intent(MainActivity.this, BowlingActivity.class);
                startActivity(intent);
            }
        });

        btn_drawer = findViewById(R.id.btn_drawer);
        btn_drawer.setOnClickListener(new View.OnClickListener() {
            @Override
            public void onClick(View view) {
                drawerLayout.openDrawer(drawerView);
            }
        });

        drawerLayout.setDrawerListener(listener);
        drawerView.setOnTouchListener(new View.OnTouchListener() {
            @Override
            public boolean onTouch(View view, MotionEvent motionEvent) {
                return true;
            }
        });

        TextView tv_url1 = findViewById(R.id.tv_url1);
        tv_url1.setOnClickListener(new View.OnClickListener() {
            @Override
            public void onClick(View view) {
                String url = "https://sojung118.tistory.com/";
                Intent intent = new Intent(Intent.ACTION_VIEW, Uri.parse(url));
                startActivity(intent);
            }
        });


    }

    //drawerlayout을 왼쪽,오른쪽으로 슬라이드했을떄 이곳에서 상태값을 받아옴
    //추가 기능을 해주고싶을때 여기서 만들기
    DrawerLayout.DrawerListener listener = new DrawerLayout.DrawerListener() {
        @Override
        public void onDrawerSlide(@NonNull View drawerView, float slideOffset) {

        }

        //오픈이 완료됐을때
        @Override
        public void onDrawerOpened(@NonNull View drawerView) {

        }

        //슬라이드 닫혔을때
        @Override
        public void onDrawerClosed(@NonNull View drawerView) {

        }

        //상태가 change 됐을때
        @Override
        public void onDrawerStateChanged(int newState) {

        }
    };


}
3. 새로 만든 LanguageActivity.java
package com.example.introducemyself;
import android.content.Intent;
import android.os.Bundle;
import android.view.View;
import android.widget.Button;
import android.widget.ImageView;
import androidx.activity.EdgeToEdge;
import androidx.appcompat.app.AlertDialog;
import androidx.appcompat.app.AppCompatActivity;
import androidx.core.graphics.Insets;
import androidx.core.view.ViewCompat;
import androidx.core.view.WindowInsetsCompat;
public class LanguageActivity extends AppCompatActivity {
Button btn_home2;
ImageView iv_htmlcssjs;
ImageView iv_python;
ImageView iv_c;
ImageView iv_mysql;
ImageView iv_nodejs;
@Override
protected void onCreate(Bundle savedInstanceState) {
super.onCreate(savedInstanceState);
EdgeToEdge.enable(this);
setContentView(R.layout.activity_language);
ViewCompat.setOnApplyWindowInsetsListener(findViewById(R.id.language_layout), (v, insets) -> {
Insets systemBars = insets.getInsets(WindowInsetsCompat.Type.systemBars());
v.setPadding(systemBars.left, systemBars.top, systemBars.right, systemBars.bottom);
return insets;
});
btn_home2=findViewById(R.id.btn_home2);
btn_home2.setOnClickListener(new View.OnClickListener() {
@Override
public void onClick(View view) {
//Intent 객체 생성
Intent intent = new Intent(LanguageActivity.this, MainActivity.class);
startActivity(intent);
}
});
iv_htmlcssjs = findViewById(R.id.iv_htmlcssjs);
// HTML/CSS/JS 설명
iv_htmlcssjs.setOnClickListener(new View.OnClickListener() {
@Override
public void onClick(View v) {
showDescriptionDialog("HTML/CSS/JS", "HTML, CSS, 그리고 JavaScript는 웹 개발의 핵심 언어들입니다.");
}
});
iv_python = findViewById(R.id.iv_python);
// HTML/CSS/JS 설명
iv_python.setOnClickListener(new View.OnClickListener() {
@Override
public void onClick(View v) {
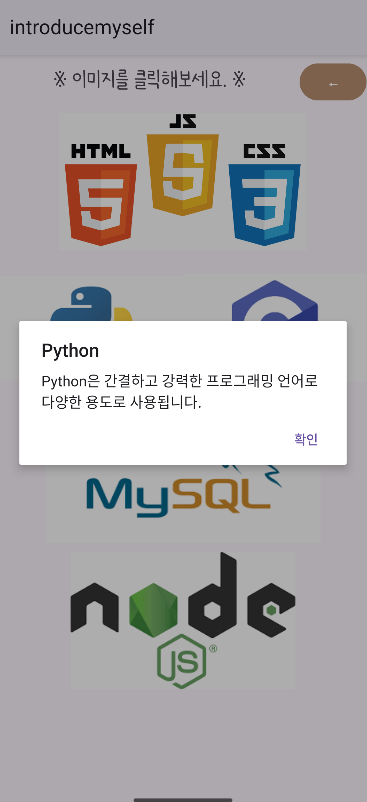
showDescriptionDialog("Python", "Python은 간결하고 강력한 프로그래밍 언어로 다양한 용도로 사용됩니다.");
}
});
iv_c = findViewById(R.id.iv_c);
iv_c.setOnClickListener(new View.OnClickListener() {
@Override
public void onClick(View v) {
showDescriptionDialog("C 언어", "C 언어는 고성능 시스템 및 애플리케이션을 개발하는 데 자주 사용됩니다.");
}
});
iv_mysql = findViewById(R.id.iv_mysql);
iv_mysql.setOnClickListener(new View.OnClickListener() {
@Override
public void onClick(View v) {
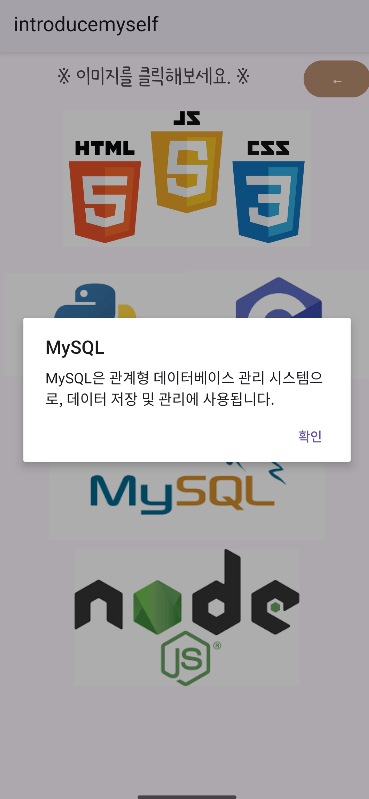
showDescriptionDialog("MySQL", "MySQL은 관계형 데이터베이스 관리 시스템으로, 데이터 저장 및 관리에 사용됩니다.");
}
});
iv_nodejs = findViewById(R.id.iv_nodejs);
iv_nodejs.setOnClickListener(new View.OnClickListener() {
@Override
public void onClick(View v) {
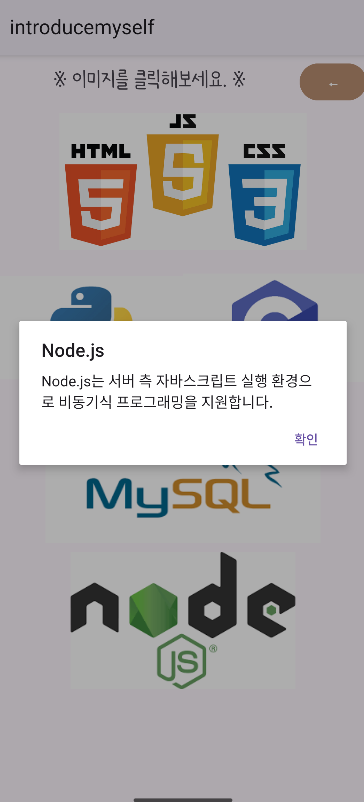
showDescriptionDialog("Node.js", "Node.js는 서버 측 자바스크립트 실행 환경으로 비동기식 프로그래밍을 지원합니다.");
}
});
}
private void showDescriptionDialog(String title, String message) {
new AlertDialog.Builder(this)
.setTitle(title)
.setMessage(message)
.setPositiveButton("확인", null)
.show();
}
}
+ AndroidManifest.xml 파일에 추가해줄 코드
<activity
    android:name=".LanguageActivity"
    android:exported="true">

</activity>
[ 최종 실행 화면 ]
 |
 |
 |
 |
 |
 |
'프로젝트' 카테고리의 다른 글
| [안드로이드 스튜디오 프로젝트] 자기소개앱_5 (ViewPager 적용) (0) | 2024.09.12 |
|---|---|
| [안드로이드 스튜디오 프로젝트] 자기소개앱_3 (DrawerLayout 적용) (7) | 2024.09.06 |
| [안드로이드 스튜디오 프로젝트] 자기소개앱_2 (ScrollView) (2) | 2024.09.05 |
| [프로젝트] DB와 연동한 동아리 신청폼 만들기 (1) | 2024.09.05 |
| [안드로이드 스튜디오 프로젝트] 자기소개앱.xml (1) | 2024.09.04 |


